Section 2.5 Creating Waypoints
Creating a Waypoint Set
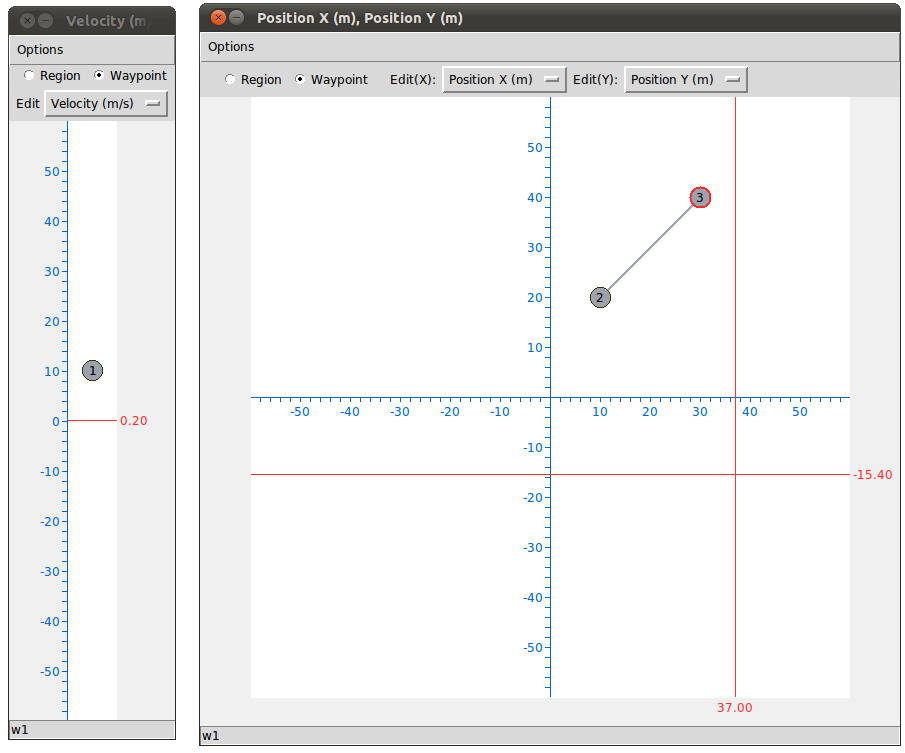
Start a new GSSP program using the Generic Robot state-variable set. Open a new 1D Graphical Designer for Velocity. Then, open a new 2D Graphical Designer for Position X and Position Y. Your set up should look like the following.
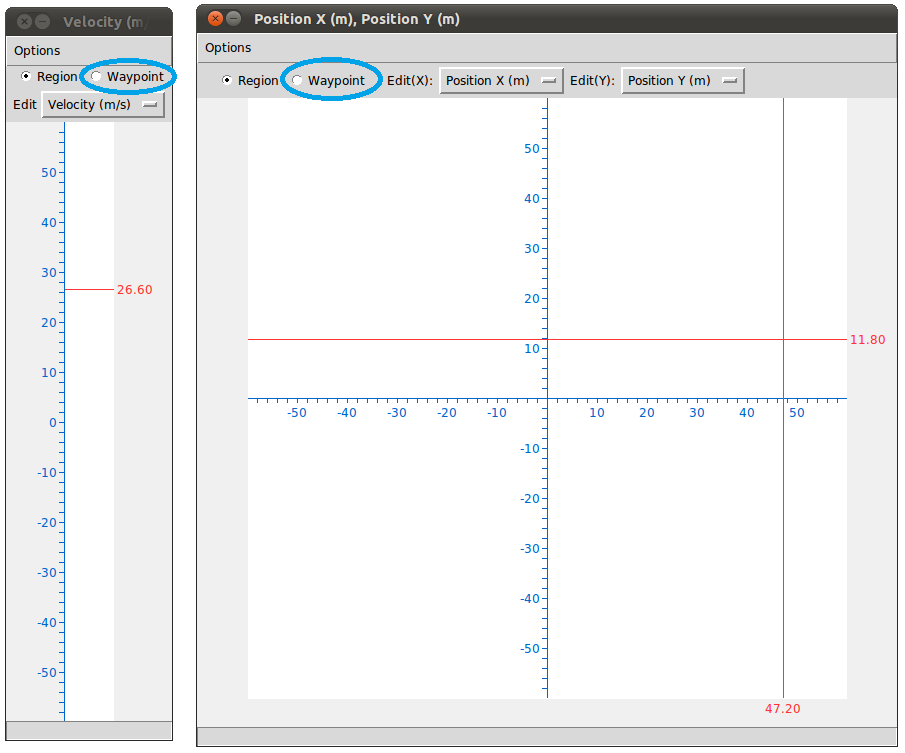
Click the Waypoint Radio Button, circled blue in the above figure, on both graphical designers. Now, left click at on the drawing area of the 1D designer at approximately 10. You should get the following.
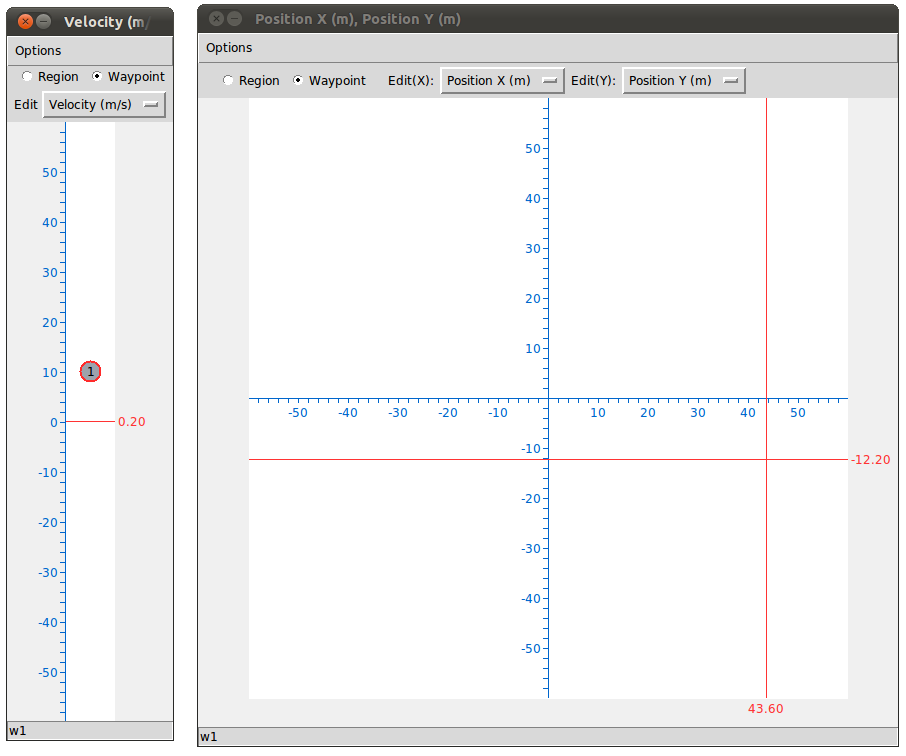
You have just created a waypoint set that contains a single one-dimensional waypoint. The red outline around the waypoint means that it is selected. Only one waypoint can be selected at a time.
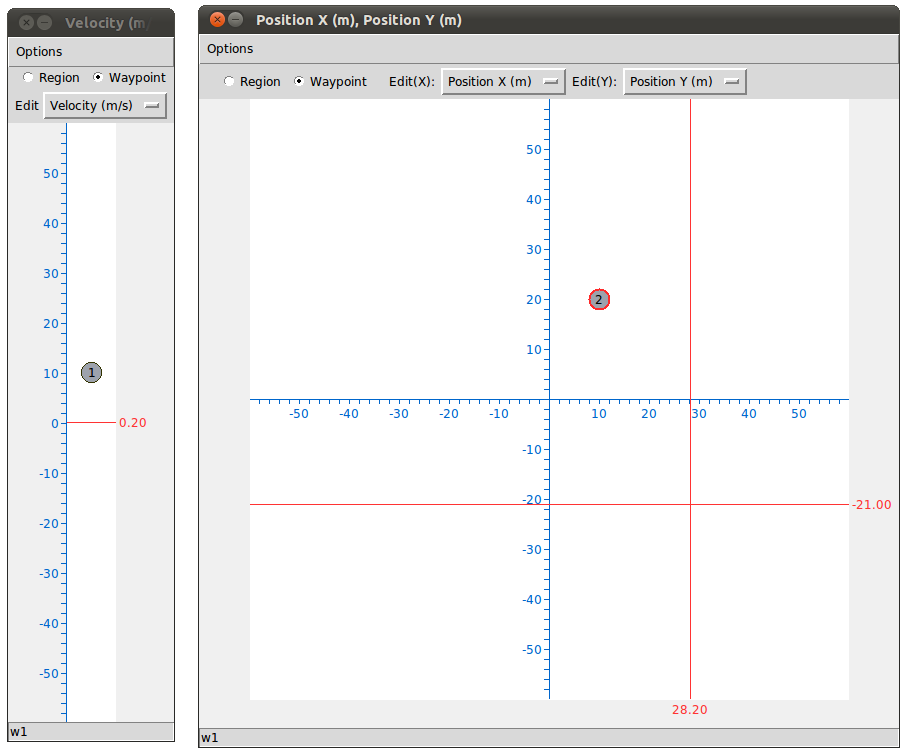
Let us insert another waypoint to this waypoint set. First, make sure the first waypoint is selected. Then, while holding down shift, left click at (10,20) in the 2D graphical designer. You should end up with the following.
When inserting a new waypoint to a waypoint set, the new waypoint is always inserted immediately after the selected waypoint. Let us create a third waypoint in the 2D designer. Select waypoint 2, and then shift-click at (30,40). You should see the following.
Now, let's try to insert a waypoint in between the second and third waypoint. First, select the second waypoint. Now, shift-click at (20,30) in the 2D designer. You should see the following.
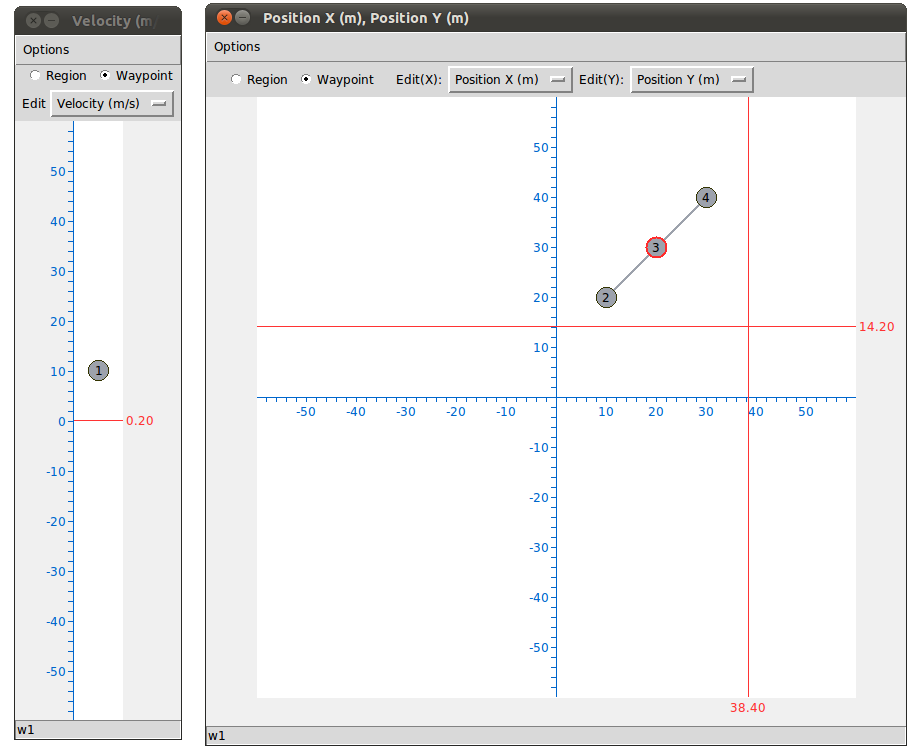
Notice that the waypoint that was originally third is now labeled fourth. And the new waypoint you created is now third.
Let us add a fifth waypoint. Select waypoint 4, then shift-click at 20 on the 1D designer. Then, while the 5th waypoint is selected, shift click at (40,-20) on the 2D designer. You should see the following.
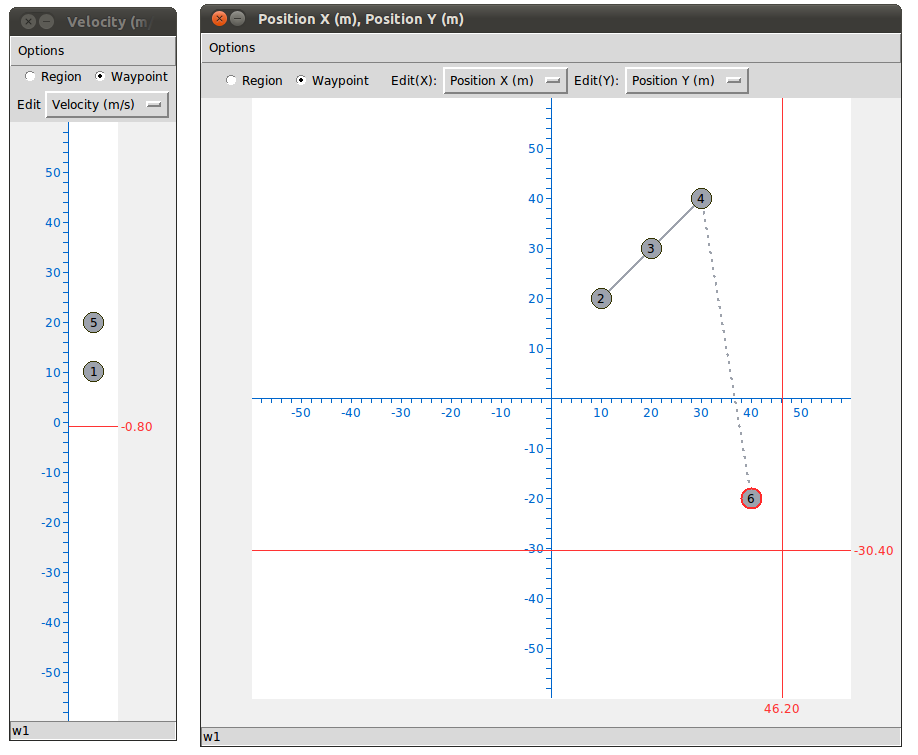
Notice the dotted line between the fourth and sixth waypoint. This dotted line indicates that one or more waypoints that cannot be visualized in this graphical designer exist between these two waypoints.
The following is what this waypoint set means in English.
- Set Velocity to 10
- Go to the location (10,20)
- Go to the location (20,30)
- Go to the location (30,40)
- Change Velocity to 20
- Go to the location (40,-20)
Adding Dimensions to Waypoints
In the waypoint set we created, waypoints 1 and 5 are one-dimensional. The other waypoints are 2 dimensional. Let us augment the dimension of waypoint 3. Open a third 1D Graphical Designer for Position Z. Make sure the Waypoint Radio Button is selected. Select waypoint 3. Then, while holding down control, left click at 20 in the designer for Position Z. The result should look like the following figure.
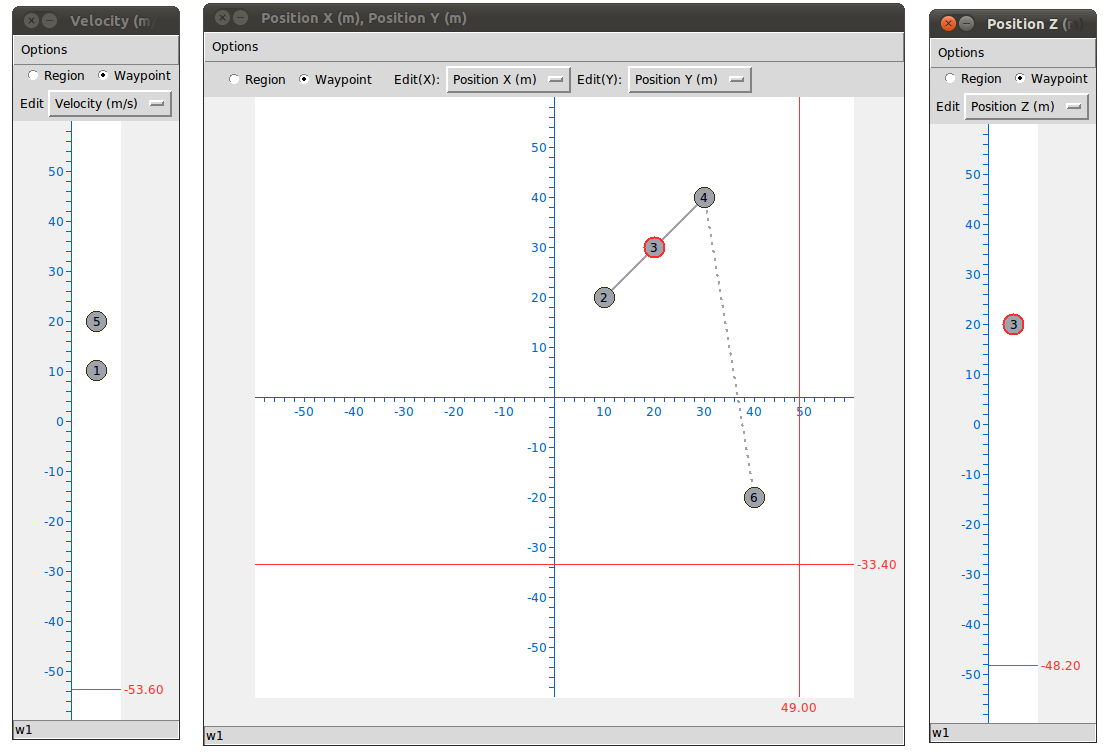
Waypoint 3 is now a three-dimensional waypoint, whose position is specified using three state-variables: Position X, Position Y, and Position Z.
Removing Dimensions from Waypoints
Open a third 1D Graphical Designer for Position X. You will see waypoints 2, 3, 4, and 6 as shown in the following figure.
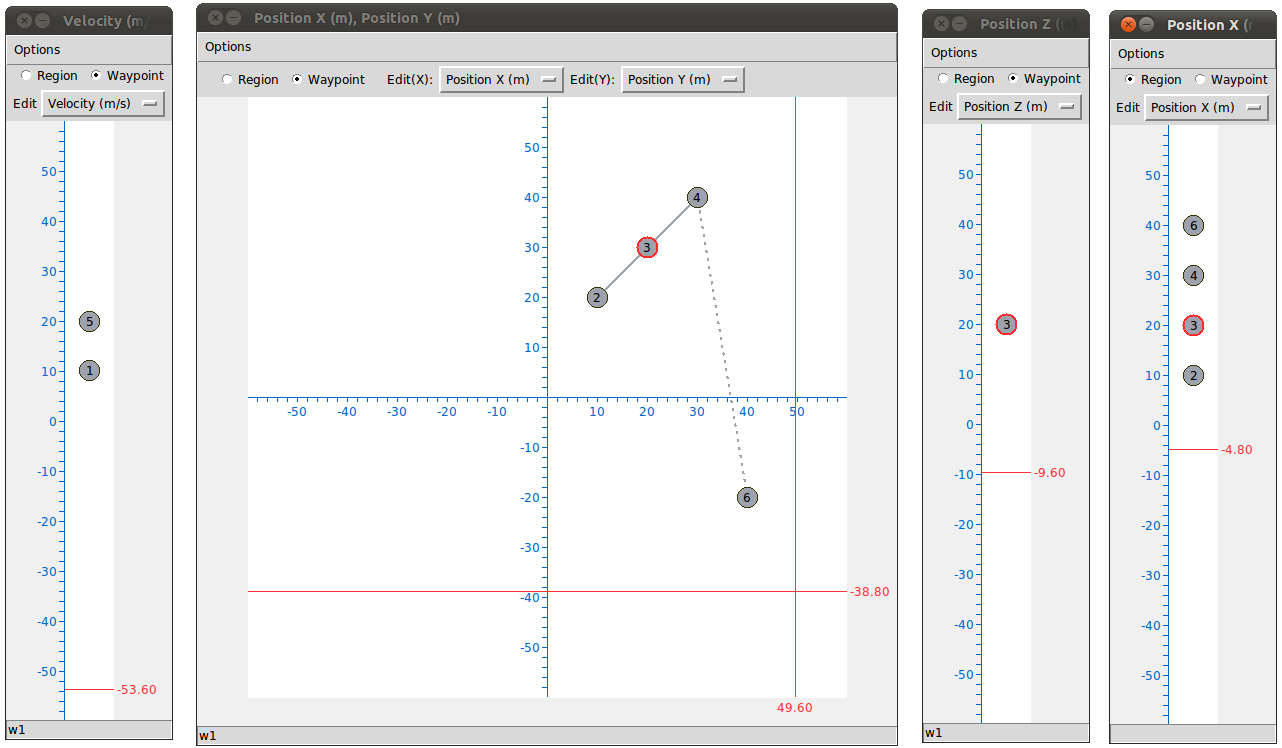
Click waypoint 3 with the middle mouse button. You will see that waypoint 3 disappears from the 1D designer for Position X, as well as from the 2D designer. This is because waypoint 3 is now a two-dimensional waypoint, specified by Position Y and Position Z. If you open a new 2D Graphical Designer for Position Y and Position Z, you will see waypoint 3.
If you delete all the dimensions of a waypoint, then the waypoint becomes zero-dimensional. A robot that is told to go to a zero-dimensional waypoint will arrive at the waypoint instantly.
Waypoint Text Editor
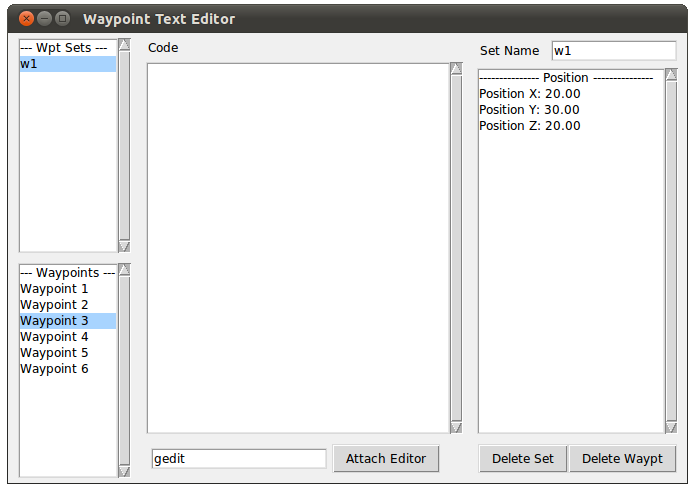
The Waypoint Text Editor should have appeared when you started the GUI. If you have closed it, you can open it again by clicking Design -> Waypoint Text Editor. You should see the following.
Waypoint Set List Box and Waypoint List Box
At the top left is the Waypoint Set List Box that displays all the waypoint sets. Below it is the Waypoint List Box, which displays all the waypoints in the selected waypoint set. Whenever you select a waypoint in a graphical designer, the selected waypoint and the corresponding waypoint set is automatically selected in the list boxes. Selecting a waypoint or a waypoint set in the list boxes will likewise update the selection in the graphical designers.
Waypoint Set Name Text Field
At the top right is the Waypoint Set Name Text Field which allows you rename the selected waypoint set. Any changes you make here will be reflected in the Waypoint Set List Box.
Position List Box
Below the Waypoint Set Name Text Field is the Position List Box that shows the specifications of the selected waypoint. You can click on them to edit their values. The changes will be reflected in the graphical editors.
Waypoint Code Editor
You can use the Waypoint Code Editor to attach code to the selected waypoint. Writing code for waypoints is very much like writing code for regions. You can attach external editors in the same way described in Section 2.2 Creating Regions.
Executing Waypoint Sets
To tell the robot to execute a waypoint set, use the built-in GSSP command startWaypoint(). First, rename the waypoint set we created to my_wpt. Then, open the Region Text Editor. Select the global region, and then attach the following code to the global region.
startWaypoint('my_wpt')
Your program should look like the following.
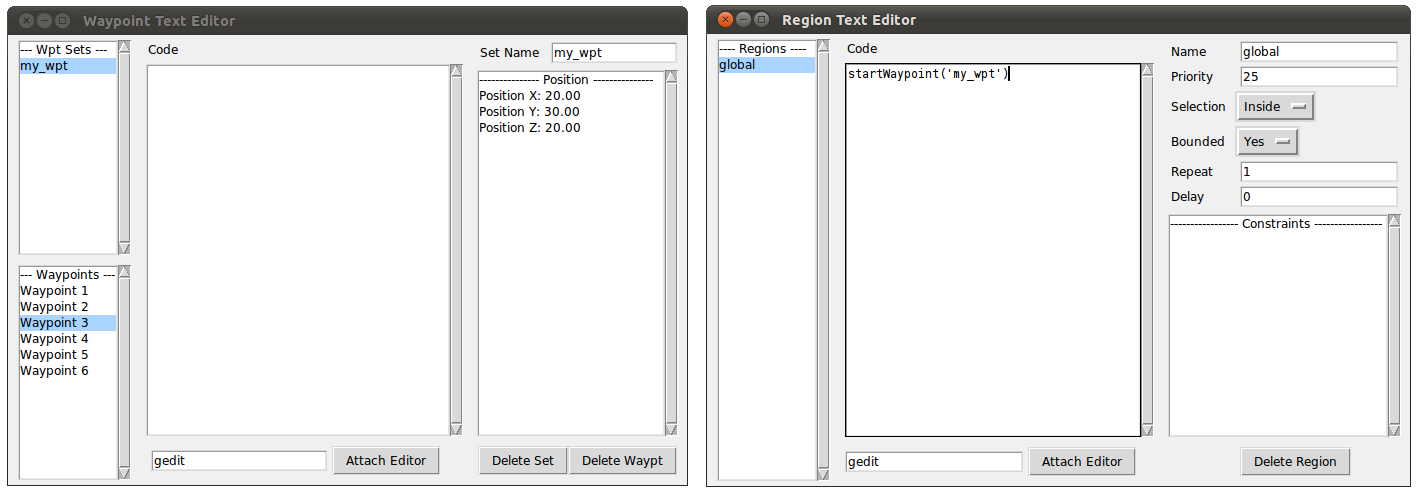
This will cause my_wpt to execute when the robot enters the global region. startWaypoint will block until all waypoints in the waypoint set have been visited by the robot. It is important to know the relationship between goTo and startWaypoint. When goTo is called, a waypoint set with a single waypoint is created using the arguments of goTo. goTo then calls startWaypoint, giving it the newly created waypoint set. So, the runtime behavior of startWaypoint is very much like goTo. Namely, startWaypoint inherits the priority of the region that invoked it, and it pauses if the invoking region is bounded and the robot exists the region. Also recall that if two goTo functions have the same priority, then the one executed later has higher priority. The same rule applies to startWaypoint. If two waypoint sets are operating simultaneously, and there is a conflict in their request for state changes, then the waypoint set that is executed later gets higher priority. Refer to Section 2.3 Customizing Region Behavior for a detailed explanation of goTo.
Nested Waypoints
You can also execute a waypoint set from the code attached to a waypoint. Recall that a waypoint set inherits the priority of the region that invoked it. If a waypoint in the waypoint set then executes another waypoint set, the new waypoint set will inherit that priority as well. Consider the program in the following figure.
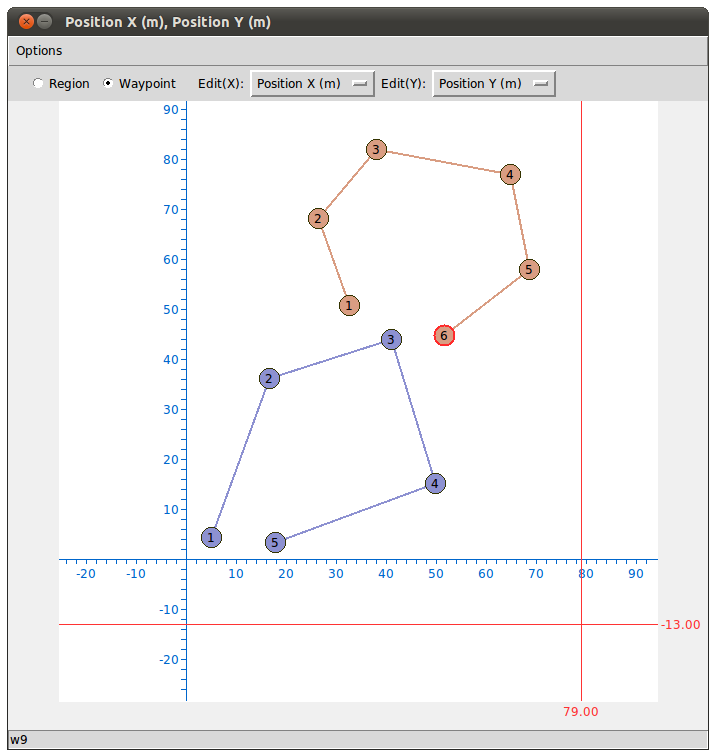
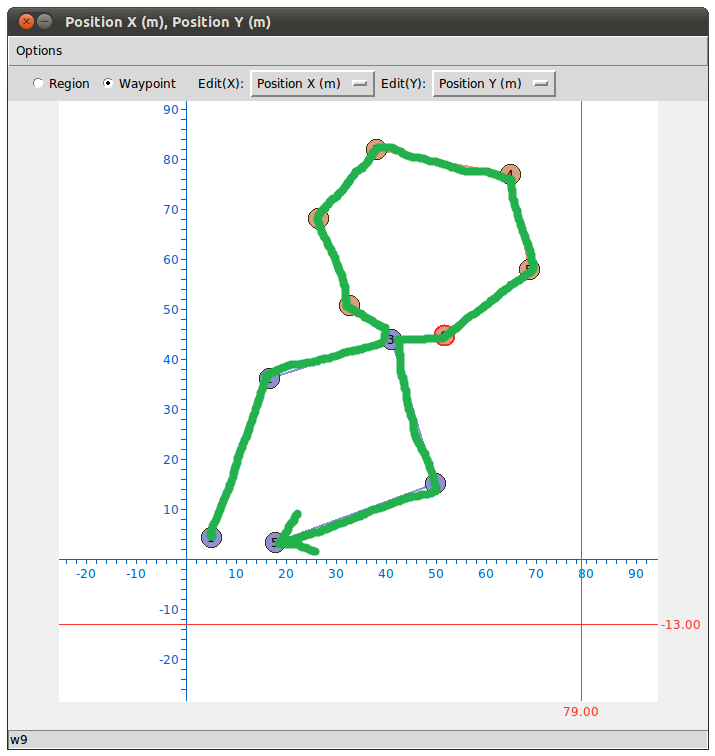
startWaypoint('red wpt set') has been attached to the third waypoint of the blue waypoint set. start('blue wpt set') has been attached to the global region. When the GSSP program starts up, the robot will first follow the blue waypoints. When the robot arrives at the third blue waypoint, it will start following the red waypoint set. Since startWaypoint is blocking, the execution of the blue waypoint set is now paused. When the robot has completed the red waypoint set, it will resume executing the blue waypoint set. The following figure shows the expected trajectory of the robot.