Section 5.1 ROS Integration
The example presented in this section requires an installation of ROS to run. If you do not use ROS or do not plan on running this example, you can skip ROS-specific details. You may find it worthwhile to go through this example even if you do not use ROS.
ROS (Robot Operating System) provides a set of tools for creating robot applications. ROS comes with the turtlesim simulator, which is a simple robot simulator for teaching ROS. The robot in the turtlesim simulator is a turtle. GSSP comes with an example program that drives the turtle around. There is also a TCP controller that allows the human to override the turtle's default movement and drive the turtle around. We will go through the various components of this example, which include a ROS package, a GSSP driver, a GSSP program, and a TCP controller.
ROS
Instructions on installing ROS and creating ROS packages can be found on the ROS tutorial. To run this example, you will need to create a ROS package called gsspmc that depends on rospy and turtlesim. To do so, you might run a command like the following in your ros package path.
roscreate-pkg gsspmc rospy turtlesim
Make sure that your $ROS_PACKAGE_PATH variable is set correctly so that ROS can find gsspmc.
Driver
In the driver folder, you will find TurtleSim.py, which is the driver we will be using. We will go through the code in this file.
import math
import threading

import roslib; roslib.load_manifest('gsspmc')
import rospy
from turtlesim.msg import Pose, Velocity
First we import python libraries math and threading. Then, we import ROS-related libraries. Your package path and dependencies need to be configured correctly for these imports to work.
class Driver():
    '''
    A GSSP driver for ROS's turtlesim simulator
    '''

    def __init__(self):
        self.lock = threading.Lock()
        self.currentState = {}

        rospy.init_node('gsspmc')
        self.pub = rospy.Publisher('turtle1/command_velocity', Velocity)
        rospy.Subscriber("turtle1/pose", Pose, self.callback)

        self.velocity = 3.0
        self.yawrate = 5.0
We create a Driver class according to the format described in Section 3.2 Creating Robot Drivers. In the constructor, we initialize self.lock to be a lock object which we will use for managing concurrency. We initialize self.currentState to be an empty dictionary which we will use to store the current state of the robot. rospy.init_node('gsspmc') tells ROS the name of our node. self.pub = rospy.Publisher('turtle1/command_velocity', Velocity) tells ROS that we will be publishing commands to the turtle1/command_velocity topic. rospy.Subscriber("turtle1/pose", Pose, self.callback) subscribes to the turtle1/pose topic and allows us to get the pose of the turtle. Each time we get the pose, we call the callback function. self.velocity is the default linear velocity, and self.yawrate is the default angular velocity.
    def callback(self, data):
        self.lock.acquire()
        self.currentState['Position X'] = data.x
        self.currentState['Position Y'] = data.y
        self.currentState['Angle'] = data.theta
        self.currentState['Velocity'] = data.linear_velocity
        self.currentState['Yaw'] = data.angular_velocity
        self.lock.release()
Each time the callback function is called, it updates the self.currentState with the current state of the robot. Locking the thread while we update the self.currentState ensures that all the states get updated at once. This way, the meta-controller thread cannot call getState while self.currentState is being updated.
    def getState(self):
        '''
        Return current state of the robot.
        '''
        return self.currentState
getState simply returns self.currentState to the meta-controller.
    def changeState(self, stateChanges):
        '''
        Change the robot's state as specified by stateChanges.
        '''
        if len(stateChanges.keys()) == 0:
            self.pub.publish(Velocity(linear=0.0, angular=0.0))

        if stateChanges.has_key('Velocity'):
            self.velocity = stateChanges['Velocity']
            self.pub.publish(Velocity(linear=self.velocity, angular=self.currentState['Yaw']))

        if stateChanges.has_key('Position X') or stateChanges.has_key('Position Y'):
            toX = 0
            toY = 0

            # If only one of Position X or Position Y is specified, we'll use the current value

            if not stateChanges.has_key('Position X'):
                toX = self.currentState['Position X']
            else:
                toX = stateChanges['Position X']

            if not stateChanges.has_key('Position Y'):
                toY = self.currentState['Position Y']
            else:
                toY = stateChanges['Position Y']

            self._moveTo(toX, toY)
changeState accepts the requested state changes from the meta-controller as argument and translates them into robot-specific commands.
if len(stateChanges.keys()) == 0 checks to see if the set of requested state changes is empty. If so, it tells the turtle to stop moving. Namely, it sets the turtle's linear and angular velocity to zero.
if stateChanges.has_key('Velocity') checks to see if the meta-controller has requested a change in the robot's velocity. If yes, we update the default linear velocity with self.velocity = stateChanges['Velocity']. Then we tell the robot to travel at the new linear velocity while maintaining the current angular velocity.
if stateChanges.has_key('Position X') or stateChanges.has_key('Position Y') checks to see if a change in Position X or Position Y is requested. If the meta-controller requests a change in only one of these variables, we use the robot's current value for the other variable. This is what the two if-else blocks do. toX and toY indicates the position we ultimately want to move the robot to. We then call the _moveTo function, giving it toX and toY. The _moveTo function computes the angular velocity that is necessary to steer the robot to the desired x y location. It then tells the robot to move at that angular velocity. The implementation of _moveTo is an exercise in geometry and we will not go through it here.
We do not require any cleanup procedures so the cleanup function is left empty.
GSSP Program
Start the GSSP GUI, and open turtle.gssp which is located in the data folder. You should see a GSSP program that looks like the following.
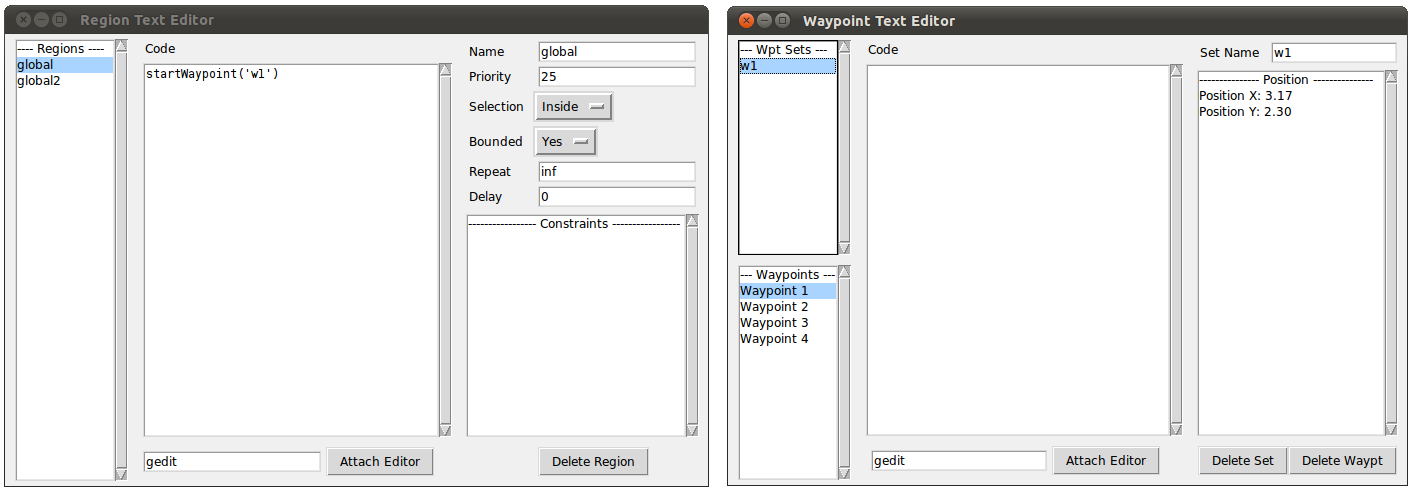
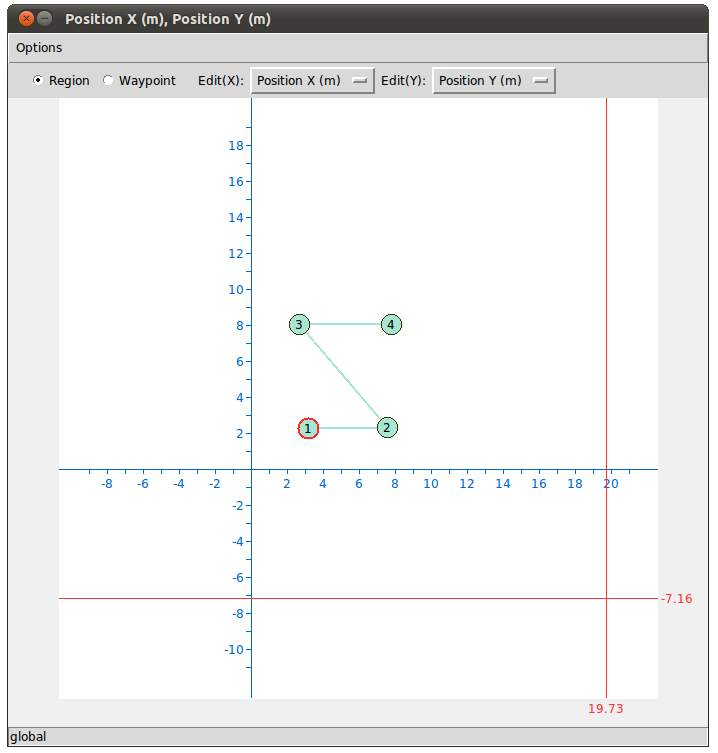
There are two regions - global and global2. Both of these are zero-dimensional regions, meaning that both region's code will be executed when the GSSP program starts up. global will initiate the waypoint set w1. You can see w1 in a 2D designer that works with Position X and Position Y.
Note that global has a repeat value of inf. This means that the robot will repeatedly execute w1 indefinitely.
global2 tells the GSSP program to listen for TCP connection on port 9559. Note that global2 has a higher priority than global. This means that commands received via TCP on port 9559 have higher priority than the waypoint set w1. Additionally, global2 has a repeat value of inf. Recall that startTCP blocks by default. Setting repeat to inf means that once the remote TCP client disconnects, startTCP(9559) will be executed again, and the GSSP program starts listening for TCP connections on port 9559 once again.
TCP Controller
In the ext folder, you will find a folder called tcp-human-control that contains the TCP controller. Inside it you will find main.py, Communication.py, and DataBoard.py. This TCP controller works with the Generic Robot state-variable set and allows the human to use the keyboard to control the robot's movement. The user can type w to go north, d to go east, s to go south, a to go west, c to stop controlling the robot, and q to quit. You can start the TCP controller by running main.py.
We will briefly discuss the implementation of the TCP controller. Communication.py contains a class called Communication. When main.py starts up, it creates a Communication object, which runs as a separate thread. main.py continuously asks the user for input. It writes the direction provided by the user in the direction variable in DataBoard.py. The Communication thread continuously receives the robot's state from the meta-controller and stores it in the variable called state in DataBoard.py.
Suppose that the user has just typed w and hit enter. w is stored in DataBoard. Communication first cancels any goTo called 'driveTo' by sending "cancelGoTo('driveTo')\n" to the meta-controller. Then, it tells the robot to go to a location north of its current location by sending a command like "goTo({'Position Y': %d, 'Position X': %d}, name='driveTo', blocking=False)\n" % (self.currentTarget['Position Y'], DataBoard.DataBoard.state['Position X']). self.currentTarget['Position Y'] is a y position that is slightly to the north of the current y position. DataBoard.DataBoard.state['Position X'] is the current x position. Note that this goTo is named "driveTo". When the robot gets close to this position, the goTo is canceled, and a new goTo is executed that tells the robot to go a little bit more to the north. This process repeats until the user gives alternate commands. The other three directions work in the same way.
If the user types c and hits enter, then Communication stops sending commands to the meta-controller. Recall that in our example, the TCP controller gets higher priority than the waypoint set w1. This means that when the user operating the TCP controller inputs a direction such as w, the robot will stop following w1, and start going north. If the user then inputs c, the robot will go back to following w1.
Running the Example
We have discussed the various components of our example. To run the example, first start ROS and turtlesim with the following commands.
roscore
rosrun turtlesim turtlesim_node
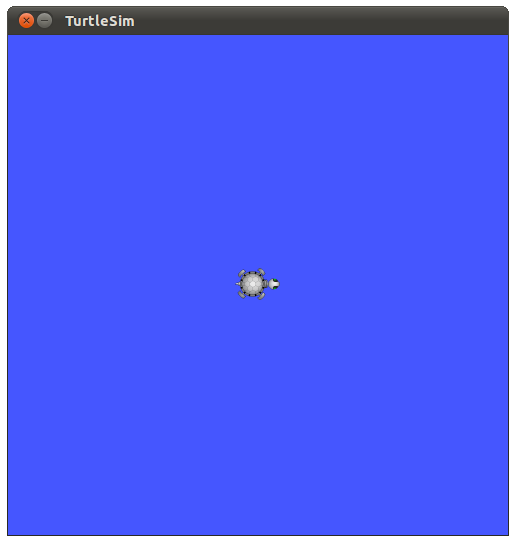
You should see turtlesim start up.
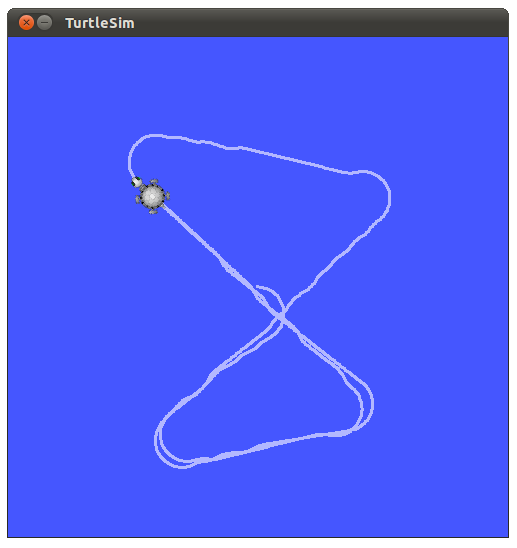
Assuming that you have started the GUI and have opened turtle.gssp, start the meta-controller from the GUI. Make sure that you choose TurtleSim.py as the driver. Section 3.3 Running the Meta-controller describes how to do this. The turtle should then start moving as shown below.
If you wish, you can attach the GUI to the meta-controller to visualize the position of the robot in the GUI. See Section 3.3 Running the Meta-controller for details on attaching to the meta-controller.
Now let us start the TCP controller. In a terminal, go into the tcp-human-control directory, and run the following command.
python main.py
You should see the following.
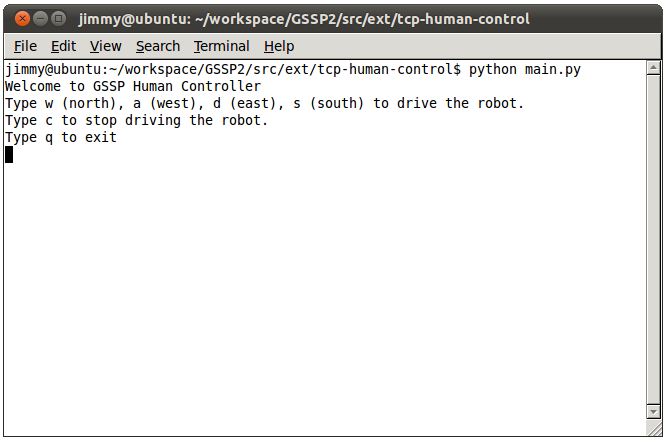
Try to tell the robot to go north by typing w and then enter. Feel free to drive the robot in other directions. Typing c and then enter will cause the robot to go back to following w1.