3.3 Running the Meta-controller
You can run a GSSP program by starting the meta-controller. To do so, run runmc.py, which is located in the same directory as main.py using the following command.
python runmc.py saveFile driver [port [log_file]]
The following is a description of the arguments.
- saveFile: The gssp save file, created using the gui. Usually has .gssp extension
- driver: The python script in the drivers folder that you want to use as the robot-specific driver. Example: my_driver.py
- port: The port to which the GUI can attach to view the robot during execution. Defaults to 9551.
- log_file: Where the meta-controller should save the log file. The log file usually has a .gssplog extension. Defaults to ./data/log_current-datetime.gssplog
Note that the meta-controller will run independent of the GUI. So, it is possible to put GSSP on the robot.
After the meta-controller starts, you will see the runmc>> prompt. To exit the meta-controller, type quit.
Starting the Meta-controller from the GUI
The GUI provides a graphical shortcut to start the meta-controller if you want to run the meta-controller on the same computer as the GUI. The GUI will ultimately run the command mentioned above in a separate process. Using the GUI is convenient in some cases because you can fill in the arguments to the command using a graphical interface.
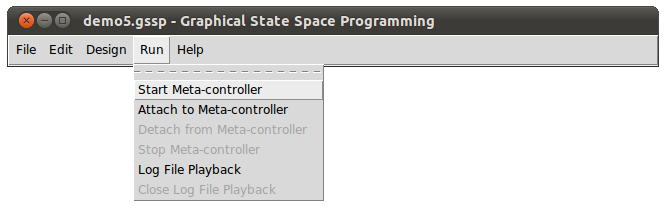
To start the meta-controller using the GUI, first create a GSSP program. For the purposes of this tutorial, use the Generic Robot state-variable set. You must save the program before you can run it. Start the meta-controller by clicking Run -> Start Meta-controller.
You should see the following.
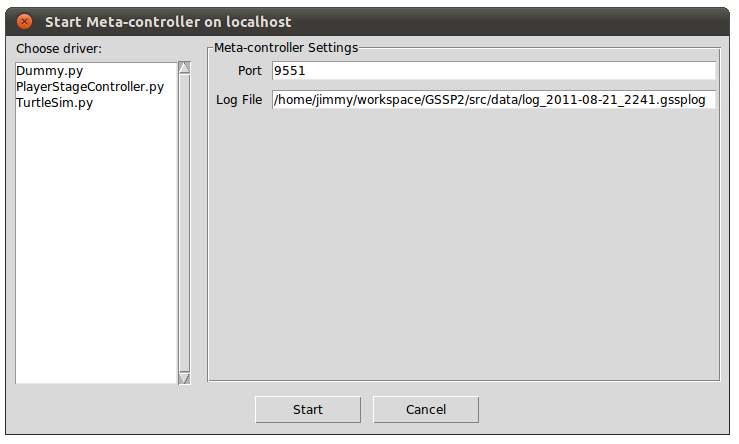
On the left side, you see all the files with a .py extension in the drivers folder. These are the robot drivers you can choose from. Choose Dummy.py. The previous section provides a description of Dummy.py. On the right side, you can specify the port and log file arguments to runmc.py. The default values should be fine. Click Start.
If you do not notice any error messages at the command line, then the meta-controller has started. At this point, you will not notice any difference in the GUI. The meta-controller is running in a separate process and has nothing to do with the GUI.
Attaching to the Meta-Controller
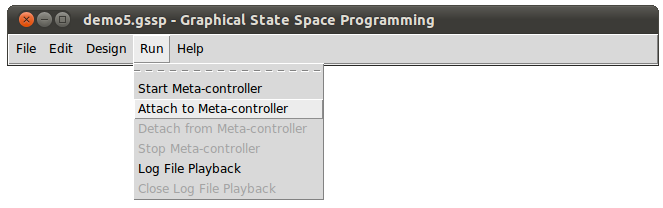
The GUI allows you to attach to a running meta-controller via TCP and visualize the robot's position in the GUI. While the meta-controller is running, click Run -> Attach to Meta-controller.
You should see the following dialog.
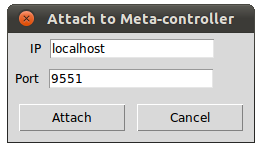
Notice that you will need to specify an IP here. So, it is possible to attach to a meta-controller that is running on a remote computer, such as that of your robot. The default values are fine for this tutorial. Click Attach.
Now, open a 2D Graphical Designer for Position X and Position Y. You should see the robot, represented as a red dot, moving in a circle. This shows you the robot's current Position X and Position Y values. Also, try opening a 1D Graphical Designer for Position X or Position Y, and you will see the robot's position for that state-variable.
The meta-controller implements an asynchronous TCP server, so it is possible for multiple GUI instances to attach to one meta-controller process.
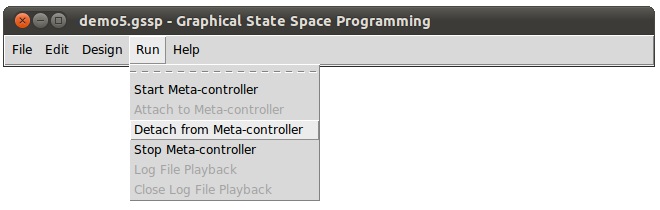
Detaching from the Meta-controller
To detach from the meta-controller, simply click Run -> Detach from Meta-controller.
The robot's position will no longer be visualized in the GUI.
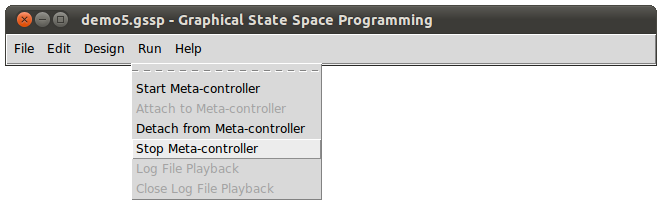
Stopping the Meta-controller
It is possible to terminate a meta-controller process from the GUI. To do so, you must first attach to the meta-controller. Then, click Run -> Stop Meta-controller.